

Choosing Lorry Mechanic Tools in 2026 is less about filling a cabinet and more about matching equipment to the work a workshop actually handles. A fleet technician servicing heavy-duty diesel vehicles needs different tools from a mobile mechanic performing roadside checks. That difference matters. Start with the jobs you do, the vehicle types you support, and the space you have. Then compare tool capacity, durability, and compatibility with the models you see most often.
Core hand tools remain essential: impact sockets, breaker bars, calibrated torque wrenches, and appropriately rated lifting and support equipment. For modern trucks, diagnostic tools should read relevant systems and communicate with vehicle software. Check supported makes, update terms, connector requirements, and how clearly the supplier explains coverage. A low price can hide gaps. So can a crowded kit.
Good buying decisions also depend on ergonomics, storage, replacement parts, and after-sales support. A wrench that feels solid in a showroom may become tiring during a full shift; real use tells more. Prioritize tools with clear ratings and instructions, and verify specifications against the vehicle and task. No single kit suits every lorry. This guide explains how to assess essential categories, compare quality and cost, and build a practical setup without paying for features your team may rarely use.
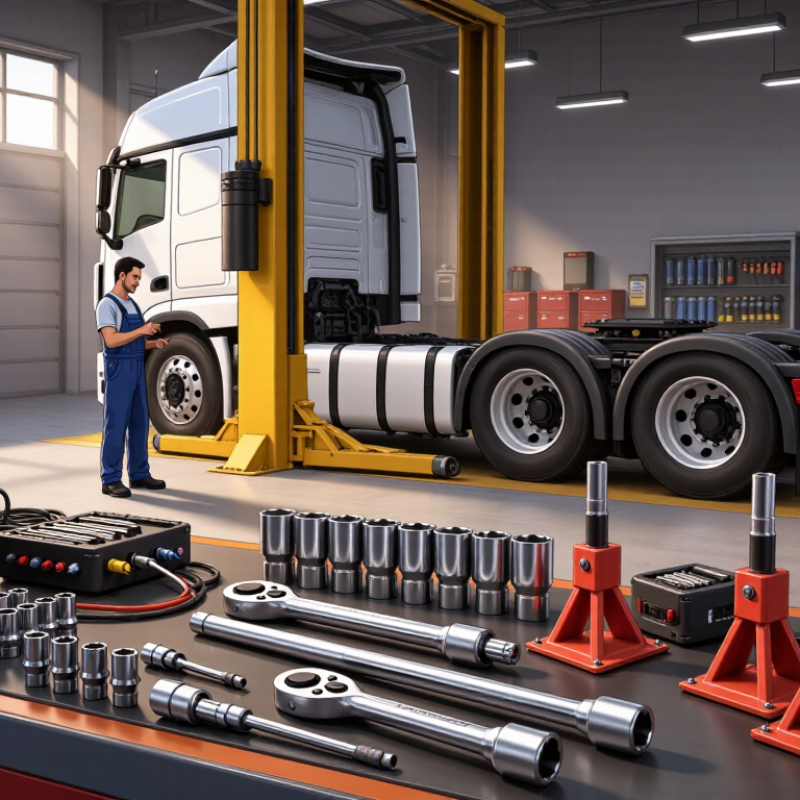
A lorry’s repair history is a better guide than a generic tool list. Note recurring jobs, such as brake adjustments, battery checks, or wheel removal. Also check the vehicle’s service manual for specified socket sizes, torque ranges, and access requirements. Small differences between models can make a familiar tool useless.
Consider where repairs happen. A well-lit workshop with a lift allows different tools than a muddy roadside shoulder. Measure the space around common fasteners, and check whether long handles or compact ratchets fit. For mobile work, account for power access, weather protection, and secure tool storage. That matters. Tools left loose can shift during transport, while damp conditions may damage electrical equipment.
Match each tool to the job’s force and precision needs. A calibrated torque wrench is important for fasteners with specified tightening values; an adjustable wrench is not a substitute. For frequent wheel work, assess suitable lifting equipment, rated capacity, and stable ground. Never rely on a jack alone. Keep it realistic. A complete kit can become heavy and costly, and some tools may rarely leave the box. Review the list after actual service work. A missing deep socket or awkward access point can reveal more than a polished checklist.
Lorry repairs call for tools suited to heavy components, tight spaces, and long working hours. A practical kit starts with hand tools: combination spanners, impact sockets, breaker bars, and reliable torque wrenches. Match socket sizes to the vehicles you service, and check that tools are rated for the loads involved. Deep sockets earn their space. They reach recessed fasteners around hubs and engine brackets.
Diagnostics are just as important. A compatible scan tool can reveal fault codes, while a digital multimeter helps test batteries, sensors, and charging circuits. Add test leads, a circuit probe, and a clear service manual for the vehicle. Codes do not explain everything. Confirm readings with physical checks before replacing parts; a loose connector can imitate a costly failure.
For wheel and chassis work, include rated lifting equipment, axle stands, wheel chocks, and a torque wrench with a current calibration check. Never rely on a jack alone. A creeper, inspection lamp, and magnetic tray can make routine jobs safer and less frustrating. Tool storage also matters: labeled drawers help prevent misplaced sockets, though labels sometimes fall off in a busy workshop. Keep a separate set of measuring tools, such as feeler gauges and calipers, clean and protected from grease.
Choosing lorry mechanic tools in 2026 is less about buying the biggest kit and more about matching daily work. A ratchet that feels smooth in a warm shop may bind when coated with cold grease. Check socket markings, drive fit, finish, and whether moving parts can be replaced. Hold tools with gloves on, if possible. Small details matter.
Compatibility deserves equal attention. Compare socket sizes, thread standards, voltage, connectors, and diagnostic coverage with the vehicles you actually service. A scanner’s long feature list may still miss a fault code on an older lorry. Ask for a current coverage list, then verify it against service records or a vehicle you know. One missed detail can idle a bay.
Compare total cost, not just shelf price. Include calibration, batteries, replacement parts, software renewals, storage, and downtime if a tool fails. A cheaper torque wrench may need frequent checking; an expensive one is not automatically more accurate. Track repair frequency for a month before replacing a set. One busy week is weak evidence, and I have seen that assumption mislead purchasing decisions. Buy tools that save measurable time, while leaving room to revise the list.
Compare tools by the work they need to perform, vehicle compatibility, safety requirements, and long-term ownership costs. Price ranges below are indicative USD estimates; actual prices vary by region, capacity, specification, and supplier.
| Tool Category | Typical Lorry Applications | Compatibility Checks | Quality and Safety Checks | Indicative Purchase Price (USD) | Total-Cost Considerations |
|---|---|---|---|---|---|
| Heavy-duty socket and spanner set | General repairs, suspension work, and fastener removal or installation. | Check drive sizes, metric or imperial sizing, socket depth, and whether the set covers the fasteners on the vehicles serviced. | Look for clear size markings, strong storage, and impact-rated sockets when used with an impact wrench. Do not use ordinary sockets on impact tools unless rated for that use. | $100–$600+ | A complete, appropriately sized set can reduce repeat purchases. Budget for lost sockets and replacements; avoid paying for sizes that are rarely used. |
| Torque wrench | Applying specified torque to wheels, chassis components, and other critical fasteners. | Match the wrench’s drive size and torque range to the vehicle’s service specifications; a high-capacity wrench may be needed for some heavy-vehicle fasteners. | Choose a clearly readable scale and documented accuracy. Follow storage instructions and arrange periodic calibration according to use and workplace requirements. | $60–$350+ | Calibration and replacement are part of ownership cost. A lower purchase price may not be economical if accuracy cannot be verified or maintained. |
| Impact wrench and air supply | Removing stubborn fasteners and carrying out repetitive workshop work. | For pneumatic tools, check compressor pressure, airflow, hose size, and couplings. For cordless tools, check battery platform, runtime, and access to replacement batteries. | Consider rated torque, weight, vibration, and serviceability. Use impact-rated sockets and follow safe operating practices; do not use an impact wrench as a substitute for final torque measurement. | $100–$700+ for the tool; compressor equipment may add substantially more. | Include batteries or compressor capacity, hoses, couplings, filters, lubrication, and repairs. Existing workshop equipment can significantly reduce the additional cost. |
| Vehicle diagnostic scanner | Reading and clearing fault codes and viewing available live data for engine and other vehicle systems. | Verify support for the specific vehicle makes, model years, engine systems, communication protocols, and functions required. A basic code reader may not access all heavy-vehicle systems. | Check update frequency, coverage documentation, connection reliability, and whether technical support is available. Confirm whether advanced functions require a paid subscription. | $100–$3,000+ depending on coverage and capabilities. | Add software updates, subscriptions, cables, and support fees over the intended ownership period. Confirm recurring charges before purchase. |
| Heavy-duty floor jack or lifting equipment | Raising a vehicle or axle for inspection and repair. | Check rated capacity, minimum and maximum lift height, contact-point design, and suitability for the vehicle and workshop floor. | Use equipment with a clearly stated load rating and inspect it for damage, leaks, and stable operation. Never work under a vehicle supported only by a jack; use suitable support stands or approved lifting equipment. | $250–$1,500+; professional lifting systems can cost much more. | Factor in inspection, maintenance, storage, and any required lifting accessories. Capacity and safe working height matter more than the lowest initial price. |
| Axle stands and wheel chocks | Supporting a raised vehicle and preventing unintended movement during work. | Check the rated capacity and height range for the intended axle or vehicle. Use chocks appropriate to wheel size and workplace surface. | Inspect welds, locking mechanisms, bases, and labels. Use stands in pairs where appropriate and follow the manufacturer’s load instructions. | $80–$400+ for suitable heavy-duty equipment. | Replace damaged equipment promptly. The cost of correctly rated support equipment is essential to safe working, not an optional add-on. |
| Digital multimeter | Electrical troubleshooting, including voltage, resistance, continuity, and selected circuit checks. | Check measurement ranges and functions against the electrical systems being tested. Select suitable leads and probes for the measurement and work environment. | Check the meter’s safety category and voltage ratings for the intended task. Inspect leads for damage and use the correct meter setting before testing. | $30–$300+ | Include replacement leads, batteries, and calibration where required. A suitable safety rating and dependable readings are more valuable than unnecessary features. |
| Battery service and testing equipment | Checking battery condition and charging or maintaining compatible vehicle batteries. | Confirm support for the battery chemistry, voltage, and capacity used in the vehicles serviced. Check charger output and connection type. | Look for reverse-polarity and over-temperature protections where applicable, clear operating instructions, and suitable leads for the intended current. | $50–$600+ | Account for test leads, clamps, maintenance, and replacement units. Choose features based on actual battery types and service volume. |
Buying approach: Confirm vehicle and task compatibility first, compare documented quality and safety features second, then calculate ownership cost using the purchase price plus subscriptions, calibration, consumables, maintenance, and replacement parts.
Smart features can make lorry repairs more precise, but they should solve real workshop problems. Consider digital torque tools that show a target value and alert you when you reach it. Check whether calibration records are easy to access and whether the tool can be recalibrated locally. A clear display matters when you are working under a chassis with gloves on. So does a battery that lasts through a full shift. Convenient features are not proof of accuracy.
Connected diagnostic tools can help technicians spot fault patterns and share reports with a fleet team. Before buying, check which vehicle systems the tool supports and how often its software is updated. Ask how data is stored, who can access it, and whether core functions still work without an internet connection. Fancy screens can distract. A simple, durable tool may be the better choice for dusty bays, cold mornings, and frequent drops. No app makes a seized fastener behave, either.
Tips: Test a tool on a familiar job before relying on it. Compare its readings with a trusted reference, inspect the casing and controls, and confirm that replacement batteries or service are available. Keep a paper backup for essential measurements. It feels old-fashioned, but it can save time when a device freezes.
Choosing lorry mechanic tools in 2026 means checking more than socket sizes. Safety begins with the tool’s condition and a clear working area. Use lifting equipment and axle stands rated for the vehicle’s load, on firm, level ground. Chock the wheels, wear eye protection, and follow the vehicle’s service instructions. Check torque wrenches according to their maintenance guidance. That matters. Under-load failures are not theoretical.
Storage affects whether tools remain safe and usable between jobs. Choose drawers or cases that secure heavy sockets, extensions, and striking tools during transport. Keep cutting edges covered and electrical tools away from moisture, metal dust, and loose cables. Label compartments clearly; a missing adapter can waste time and encourage unsafe improvisation. Keep them dry.
Maintenance requirements vary by tool, so keep manuals and inspection records accessible. Before each shift, look for cracked handles, damaged leads, worn sockets, or leaking air hoses. Remove questionable tools from service until repaired or replaced. Clean tools after use, lubricate only where specified, and arrange calibration for measuring tools at the recommended interval. It is easy to postpone a small repair; that habit deserves a second look. A tidy kit helps, but it cannot make a damaged tool safe.

