

How to Choose the Right Ultrasonic Disperser

Choosing an Ultrasonic Disperser is not simply a matter of selecting the highest power rating. The right model depends on the material, batch size, and process you need to control. A probe that works well for a small beaker may struggle with a larger or more viscous sample. Small details matter.

Before comparing equipment, define what the disperser must do. Note the sample volume, viscosity, temperature limits, and desired processing time. Consider whether you are breaking up agglomerates, reducing particle size, or creating a stable emulsion. These goals can require different operating conditions. A clear target helps narrow the options.

Power and amplitude deserve attention, but they do not tell the whole story. Probe diameter, material compatibility, and cooling needs also affect performance. For instance, a narrow probe may suit a small vessel, while a larger batch may need a different setup. Check the manufacturer’s guidance for recommended volumes and operating cycles. Then test the material at a practical scale, monitoring temperature and dispersion quality. Results can vary. That is worth admitting.

This guide explains how to compare key specifications, match a probe to your sample, and assess safety and maintenance features. It also highlights common selection mistakes, such as choosing by wattage alone or overlooking heat buildup. No specification can replace a suitable trial. Careful evaluation helps you choose an Ultrasonic Disperser that fits your workflow, rather than one that merely looks powerful on paper.
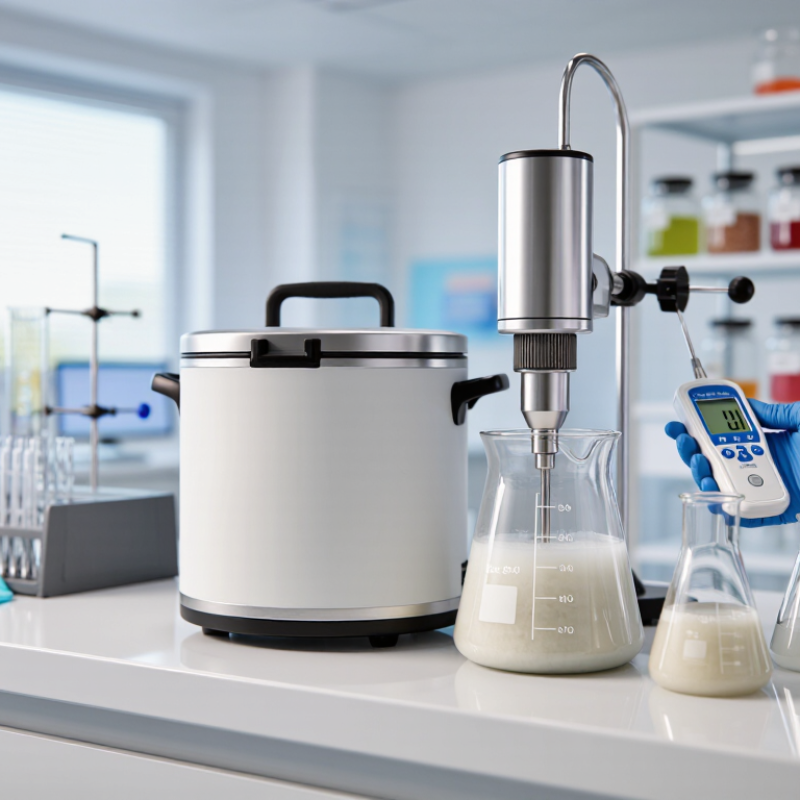
How to Choose the Right Ultrasonic Disperser

Understanding How Ultrasonic Dispersers Work

An ultrasonic disperser converts electrical energy into rapid mechanical vibration. A transducer drives a probe, or horn, immersed in the liquid. The probe creates alternating high- and low-pressure zones. During low-pressure cycles, tiny vapor bubbles form; during high-pressure cycles, they collapse. This process, called acoustic cavitation, produces localized shear and microjets that break agglomerates and improve mixing.

The effects are intense but confined. Suslick’s review in Science (1990, volume 247, pages 1439–1445) reports bubble-collapse conditions near 5,000 K and 1,000 atmospheres, with heating and cooling rates above 10 billion K per second. These are estimates for microscopic collapse zones, not temperatures or pressures throughout the vessel. That distinction matters. In practice, dispersion also depends on probe amplitude, liquid viscosity, batch volume, and how well the probe is positioned.

When comparing dispersers, match the working volume and material to the process, then check amplitude control and cooling needs. I would not treat nominal wattage as delivered energy; that shortcut is tempting, but imperfect. A narrow vessel can create uneven treatment, while a probe placed too near the base may cause unwanted wear. Record treatment time, temperature, and sample volume, and test the actual formulation before scaling up. Even small changes in viscosity can alter cavitation and the final particle distribution.

Identifying Your Materials and Dispersion Requirements

Before choosing an ultrasonic disperser, describe the material, not just the desired particle size. Record its solid or liquid state, viscosity, solids loading, and whether particles settle or form stubborn agglomerates. Note temperature sensitivity and any risk of contamination from a probe. Small details matter. A thick slurry and a watery suspension may need very different mixing geometry and processing time.

Set a measurable target: particle-size distribution, uniformity, batch volume, and acceptable temperature rise. ISO 13320:2020 covers laser-diffraction particle-size analysis across a broad measurement range; practical instrument ranges can extend from roughly 0.1 to 3,500 micrometres, depending on configuration. That is an analysis range, not a guarantee that an ultrasonic unit can disperse every material to that size. Compare measurements before and after treatment, and track more than the median size. A stable coarse tail can still signal incomplete dispersion.

Then match the operating setup to the sample. Consider probe diameter, vessel shape, batch volume, and whether continuous flow is needed. For heat-sensitive samples, use short pulses and monitor the liquid temperature; a cold-water bath can help, but it may not prevent local heating near the probe. ASTM E2490 provides guidance on characterizing nanoscale materials, while ISO 22412:2017 covers dynamic light-scattering particle-size analysis. Use a suitable measurement method for your material, and repeat tests: results can shift with sampling and preparation.

Choosing the Right Power, Frequency, and Capacity

Choosing an ultrasonic disperser starts with the material and batch size, not the largest power rating. Thick slurries and stubborn agglomerates usually need more energy than thin liquids. But rated watts do not tell you how much energy reaches the sample. Probe size, immersion depth, and vessel shape matter too. A narrow beaker with a small probe can behave very differently from a wide tank. Leave room for circulation; stagnant corners can remain poorly dispersed.

Frequency affects the cavitation pattern. Many laboratory systems operate near 20 kHz, offering strong cavitation for breaking up particles. Higher frequencies may suit gentler processing or smaller samples, depending on the formulation. There is no universal best setting. Test a small batch and check particle size, appearance, and temperature before scaling up. Results can be less predictable than expected.

Tips: Match the stated capacity to your actual working volume, not the vessel’s maximum fill line. For heat-sensitive samples, use short pulses and monitor temperature with a probe. If processing becomes inconsistent, pause and reassess the probe position; changing power alone may not fix it. A simple test log helps, though it is easy to forget one detail.

Comparing Probe and Processing System Designs

How to Choose the Right Ultrasonic Disperser

Comparing Probe and Processing System Designs

A probe disperser sends ultrasonic energy directly into a sample through a vibrating tip. This compact design suits small batches, formulation trials, and materials that need adjustable treatment. Match the probe diameter to the vessel and liquid volume. A narrow tip can focus energy in a small region, but may create uneven treatment if the vessel is too large. Fit matters. Keep the tip immersed at the recommended depth, and watch for foaming, splashing, or excess heat.

Processing systems use a chamber or flow-through cell to expose material under more controlled conditions. They can be useful when continuous throughput, repeatable residence time, or easier scale-up matters. Check whether the system supports your target flow rate, pressure, and cooling needs. A jacketed chamber, for example, can help manage heat during longer runs. Yet a flow path adds surfaces that may retain material, so cleaning access and wetted-part compatibility deserve close attention.

Compare designs using the same sample, volume, and treatment goal whenever possible. Record temperature, processing time, and visible changes; small differences can affect results. Probe systems offer flexibility, while integrated systems can improve process control. Neither is automatically better. I would also leave room for uncertainty: bench tests may not predict larger batches perfectly, especially when viscosity or solids content changes. Test before committing.

How to Choose the Right Ultrasonic Disperser - Comparing Probe and Processing System Designs
Design Consideration Batch Probe Disperser Flow-Through Processing System
Basic configuration A vibrating probe (sonotrode) is immersed directly into a vessel containing the material. Material is pumped through a treatment chamber, where an immersed probe delivers ultrasound. The probe and flow cell are typically parts of an integrated process setup.
Typical operating mode Batch processing: a measured quantity is treated in a beaker, tank, or other suitable vessel. Continuous or recirculating processing: material passes through the treatment zone once or in repeated passes.
Best suited to Laboratory development, small-to-medium batches, formulation trials, and applications where recipes change frequently. Repeated production runs, larger or ongoing workloads, and processes that benefit from controlled material flow and repeatable treatment conditions.
Contact with the sample The probe contacts the sample directly. Probe material, wear, immersion depth, and cleaning procedures should be considered. The probe contacts material inside the flow cell. Wetted surfaces, seals, and chamber geometry must be compatible with the sample and cleaning method.
Process control Simple to set up, but treatment can vary with vessel geometry, fill volume, probe position, and mixing. Flow rate, pressure, temperature, and number of passes can be monitored or controlled; consistent results still depend on suitable process settings and system design.
Temperature management Heat may build up during sonication. A cooling bath, jacketed vessel, or pulsed operation may help manage temperature-sensitive samples. Continuous flow can support process integration, but it does not eliminate heating. Cooling capacity and residence time should be evaluated for the application.
Scale-up considerations Increasing vessel volume alone may not preserve treatment uniformity. Probe placement, delivered energy, and mixing conditions may need reassessment. Scale-up can involve changes to flow rate, chamber capacity, or parallel treatment paths. Validate performance at the intended throughput rather than relying on volume alone.
Cleaning and changeover The probe can often be removed for cleaning, but the vessel and probe must be cleaned between materials as required by the process. The flow path and treatment chamber require a suitable cleaning procedure. Consider drainability, disassembly, and the risk of retained material.
Main advantages Direct energy delivery, flexible setup, straightforward sampling, and convenient adjustment during development work. Well suited to continuous workflows, controlled throughput, and integration with pumps, tanks, or other process equipment.
Potential limitations May require careful positioning and temperature control; treatment uniformity can be sensitive to vessel and batch conditions. More process equipment and setup may be required. Pumpability, pressure limits, flow behavior, and cleaning requirements can constrain use.
Selection questions Will the batch size fit the vessel and probe? Can temperature and mixing be managed? Is direct probe contact acceptable? Can the material be pumped reliably? What throughput and number of passes are needed? Can the flow path be cleaned and maintained appropriately?

Note: Actual performance depends on the material, vessel or chamber geometry, probe dimensions, operating conditions, and process goals. Confirm suitability through application testing.

Evaluating Controls, Safety, and Maintenance Needs

Control quality starts with controls that are easy to adjust and repeat. Look for clear settings for amplitude, pulse timing, and run duration. A readable display helps operators record a proven setup instead of relying on memory. For heat-sensitive samples, check whether the unit can pause between pulses and monitor temperature. A practical trial with your actual vessel and sample can reveal whether the controls feel precise enough. The best setting is not always obvious; a short test may challenge your assumptions.

Safety features should match the way the disperser will be used. A stable stand and secure vessel reduce movement during processing. Check for overload protection and a way to stop the unit quickly. Ultrasonic equipment can be loud, and some samples may produce splashes or aerosols. Use suitable shielding, ventilation, and personal protective equipment based on the sample and workplace assessment. Never operate a probe dry, and follow the equipment instructions for immersion depth.

Maintenance affects both reliability and results. Inspect the probe tip for pitting, cracks, or uneven wear; erosion can change performance. Clean the probe promptly using a method compatible with its material, then dry it before storage. Check cable connections and mounting hardware regularly. Keep a simple log of run settings, cleaning, and probe condition. It takes a little time, but skipped records make subtle changes harder to trace.

How to Choose the Right Ultrasonic Disperser

Compare key controls, safety features, and maintenance considerations before selecting a system.

Illustrative evaluation priorities on a 1–5 scale, not measured product ratings. Prioritize adjustable amplitude and power, safety interlocks, and straightforward probe maintenance for your application.

Article Source: