
How to Choose the Right Mold Design for Your Product?

Choosing the right mold design can determine whether a product succeeds on the factory floor. It affects appearance, strength, cycle time, maintenance, and total production cost. A polished prototype does not guarantee reliable molding. Hidden risks often appear later.

Experienced engineers begin with the product itself. They study wall thickness, draft angles, ribs, undercuts, tolerances, and surface requirements. Material selection matters too. Glass-filled nylon behaves differently from ABS or silicone. A sharp corner may create stress. Poor cooling may leave visible sink marks near thick sections. Small details can create expensive problems.

Production volume also changes the decision. A simple two-plate mold may suit a limited run. High-volume products may need hot runners, automated ejection, or multiple cavities. The best choice depends on evidence, not assumptions. Mold-flow analysis, prototype trials, and supplier reviews can expose weaknesses before full production. Still, no simulation predicts everything. Real machines, operators, and material batches introduce variation. That uncertainty deserves attention.

A dependable mold design balances performance, budget, manufacturability, and future maintenance. It should support consistent parts, safe operation, and practical repairs. Ask direct questions about steel grades, cooling channels, expected cycle life, inspection records, and replacement components. Request measurable validation, not vague promises. A trusted manufacturer will explain trade-offs clearly and acknowledge limitations. Sometimes the first design is not the best one. Careful revision often prevents larger failures. This guide explores the key factors behind that decision, helping teams choose a mold that performs beyond the initial sample.
How to Choose the Right Mold Design for Your Product?

Define Product Requirements and Mold Performance Goals

Before choosing a mold design, define what the product must survive. Record material grade, wall thickness, dimensions, surface finish, annual volume, cycle time, and acceptable defect levels. A food container, for example, may need uniform walls, easy release, and controlled warpage near its sealing rim. A cosmetic housing may prioritize appearance over extreme impact strength. Small details matter.

Performance goals should be measurable. Set limits for flash, sink marks, shrinkage, cycle time, mold life, and dimensional variation. ISO 20457 provides guidance for tolerances in injection-molded plastic parts, but its values should not replace product-specific testing. According to PlasticsEurope’s 2023 industry report, global plastics production exceeded 400 million tonnes in 2022. That scale increases pressure to reduce scrap, energy use, and unnecessary mold revisions. A mold that runs quickly but creates unstable parts is not truly efficient.

Material behavior must guide the design. Glass-filled polymers may demand stronger gates, better venting, and wear-resistant components. Recycled content can also change flow and shrinkage. The OECD’s Global Plastics Outlook reported 353 million tonnes of plastic waste in 2019, making material efficiency an important design responsibility. Yet, recycled feedstock is not always consistent. That assumption deserves testing. Use trial shots, dimensional studies, and realistic production conditions before approving the final mold. A perfect first specification is unlikely. Recheck it.

How to Choose the Right Mold Design for Your Product?

Define Product Requirements and Mold Performance Goals

Material shrinkage is a key product requirement when defining mold design. The typical linear shrinkage ranges shown above help guide cavity compensation, cooling-channel layout, gate location, and dimensional-tolerance planning. Actual shrinkage varies with material grade, part geometry, wall thickness, processing conditions, and fiber reinforcement.

Evaluate Material Properties and Part Geometry

How to Choose the Right Mold Design for Your Product?

Evaluate Material Properties and Part Geometry

Material properties shape nearly every mold decision. A resin’s shrinkage, flow behavior, hardness, and heat resistance affect cavity dimensions and cooling layout. Flexible materials may need wider gates and careful ejection support. Heat-sensitive plastics require balanced filling and controlled mold temperatures. Do not trust datasheets alone. Production trials often reveal different behavior.

Part geometry creates another set of demands. Deep ribs can trap air and increase filling pressure. Thin walls may cool too quickly, leaving weak weld lines or visible flow marks. Uniform wall thickness usually improves consistency. Sharp internal corners can concentrate stress and restrict material flow. Add suitable radii and draft angles where possible.

For a small housing, I would inspect wall transitions, fastener bosses, and ejection marks before choosing the mold structure. During mold reviews, experienced engineers compare the part model with actual processing conditions. That assumption can fail. A pilot mold or flow analysis may expose hesitation near a narrow rib. We also check whether sliders, lifters, or inserts are truly necessary, because each moving feature adds maintenance and alignment risk. A simple design is often easier to control, but simplicity should not ignore difficult geometry. Leave room for adjustment.

Compare Mold Types, Cavity Layouts, and Ejection Methods

How to Choose the Right Mold Design for Your Product?

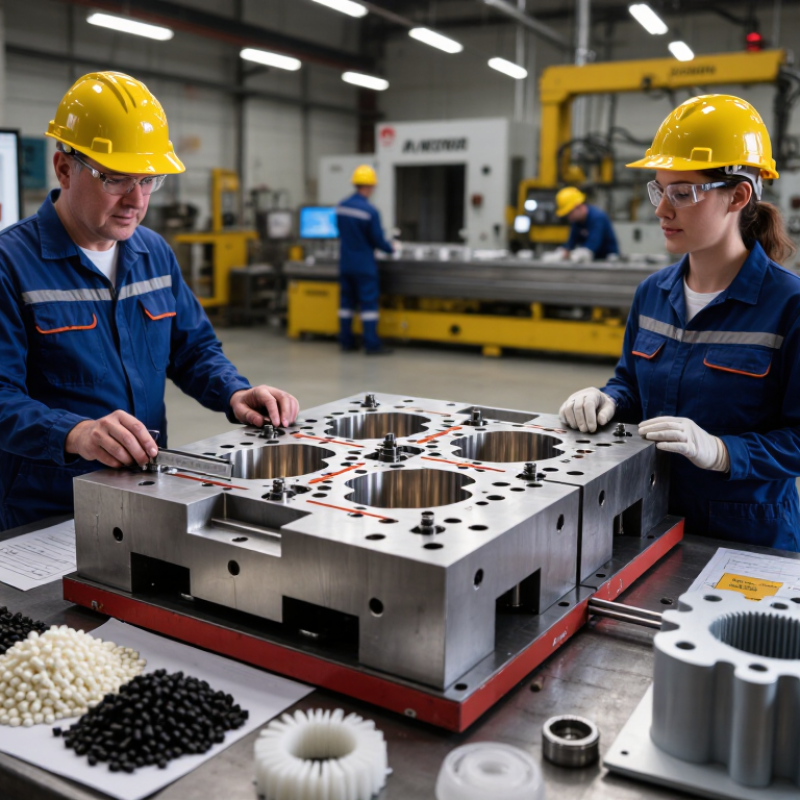
Mold selection begins with the part, not the machine. A two-plate mold suits many simple components and keeps construction practical. A three-plate mold can improve gate placement, but it adds cost and maintenance. Family molds produce several parts together, yet uneven filling can create defects. For stable production, separate cavities often provide better control.

Cavity layout affects pressure, cooling, and cycle time. Balanced runners should deliver material evenly to every cavity. A symmetrical layout usually reduces variation. Still, perfect balance is not always possible. I have seen compact layouts save steel but create difficult cooling channels. That trade-off deserves careful review. Check wall thickness, shrinkage, and expected production volume before approving the design.

Tips: Match ejection to the part’s geometry. Ejector pins work well on strong flat areas. Sleeve ejectors suit cylindrical features, while stripper plates protect delicate surfaces. Air ejection may help with deep containers, but it requires reliable sealing. Avoid placing pins near thin ribs or visible surfaces. Ask for mold-flow analysis and a trial report. Small marks may seem acceptable on a drawing, but they can become expensive quality problems during production.

Assess Manufacturing Costs, Production Volume, and Maintenance

How to Choose the Right Mold Design for Your Product?

Assess Manufacturing Costs, Production Volume, and Maintenance

Mold design should begin with production reality, not appearance. Estimate machining, steel, tooling, testing, and hourly machine costs together. A low-cost mold may seem attractive initially. It can become expensive after repeated repairs. For a short production run, a simpler mold with fewer cavities may provide better value. Aluminum tooling can also reduce initial investment, although it may wear faster under demanding conditions.

Production volume changes the design decision. Small batches usually benefit from accessible components and uncomplicated ejection systems. Large volumes often justify hardened steel, multiple cavities, and automated runners. These features raise the upfront cost but can reduce cycle time and labor. Calculate the target quantity carefully. Forecasts are sometimes optimistic. Building for millions of parts may waste capital if demand remains uncertain.

Maintenance deserves attention before the first sample is produced. Choose replaceable inserts for surfaces exposed to abrasion or frequent impact. Leave enough space to remove ejector pins without dismantling the entire mold. Cooling channels should be easy to inspect and clean. Poor cooling access can create longer cycles, uneven shrinkage, and frustrating downtime. Ask the toolmaker for a maintenance schedule and spare-part list. That practical document often reveals hidden costs. Design reviews should include operators and technicians, not only engineers. Their experience may expose a small access problem that drawings miss. Some decisions will still require revision. That is normal.

How to Choose the Right Mold Design for Your Product? - Assess Manufacturing Costs, Production Volume, and Maintenance

Typical planning ranges for thermoplastic injection molds. Costs are in USD and vary with part size, complexity, tolerances, cavity count, and regional labor rates.

Mold design option Typical mold cost Recommended annual volume Expected tool life Typical lead time Maintenance profile Best suited for Main trade-off
Prototype aluminum mold $3,000–$15,000 Up to 10,000 parts Approximately 5,000–50,000 shots 2–6 weeks Low; inspect vents, parting line, and ejectors regularly Design validation, samples, and short pilot runs Lower upfront cost but shorter service life and limited wear resistance
Production aluminum mold $10,000–$40,000 10,000–100,000 parts per year Approximately 50,000–250,000 shots 4–10 weeks Low to moderate; monitor cooling channels and gate wear Low-to-medium volume products with frequent design updates Faster machining and good heat transfer, but less durable than steel
Pre-hardened steel mold $20,000–$80,000 100,000–500,000 parts per year Approximately 250,000–750,000 shots 6–14 weeks Moderate; periodic polishing, alignment checks, and seal replacement General production parts requiring a balance of cost and durability Higher initial investment than aluminum with less wear resistance than hardened steel
Hardened steel mold $50,000–$250,000+ 500,000+ parts per year Approximately 1,000,000–2,000,000+ shots 10–24 weeks Moderate to high; scheduled refurbishment is essential Long-running, high-volume products and abrasive materials Highest upfront cost and longer build time, but lowest cost per part at scale
Multi-cavity mold $60,000–$300,000+ 250,000–5,000,000+ parts per year Typically 500,000–2,000,000+ shots 12–28 weeks High; cavity balance, hot-runner service, and synchronization checks Stable, high-demand parts with predictable sales volume Lower cycle cost per part but greater tooling complexity and repair cost
Family mold $25,000–$120,000 25,000–500,000 sets per year Approximately 100,000–750,000 shots 8–18 weeks Moderate to high; inspect filling balance and flash on each part Related components made from compatible materials and produced in matched quantities One tool produces multiple parts, but uneven filling can reduce yield
Stack mold $100,000–$400,000+ 1,000,000+ parts per year Approximately 500,000–2,000,000+ shots 16–32 weeks High; inspect stack alignment, center section, manifolds, and cooling circuits Very high-volume parts where machine platen capacity is limited High output per molding cycle, but complex setup and maintenance requirements
Planning note: A mold’s total cost should include design, machining, steel or aluminum, hot-runner components, validation, spare inserts, preventive maintenance, and expected downtime. For reliable selection, compare the estimated cost per good part across the full production volume rather than comparing mold prices alone.

Select the Mold Design and Validate It Through Testing

A suitable mold design begins with the product, not the machine. Review wall thickness, draft angles, undercuts, tolerances, and expected production volume. These details influence cavity layout, cooling channels, gate location, and ejection strategy. Material behavior matters too. Some resins shrink unevenly or require careful temperature control. An experienced designer should document each assumption before selecting a mold concept. That record makes later changes easier to explain and verify.

Do not approve a design from a drawing alone. Use flow simulation when geometry is complex, then confirm the findings with trial molding. Inspect the first shots for short fills, weld lines, sink marks, flash, and warpage. Measure critical dimensions at a controlled temperature, using calibrated equipment. Check cycle time and part weight across repeated shots, not one favorable sample. Testing should also include ejection force and visible stress near pins or thin walls. Small defects often reveal larger design weaknesses.

In practical projects, the first trial rarely behaves perfectly. A gate may fill one corner too quickly. Cooling may look balanced but still leave a curved part. Treat these results as evidence, not embarrassment. Adjust steel, processing conditions, or both, and record the reason for every change. Then repeat the test with production-grade material and realistic machine settings. I would not trust a mold after one successful sample. Stable results across repeated cycles provide stronger evidence for release.