10 Tips for Single Level Go Kart Track Design
Designing a fast, enjoyable karting circuit requires more than drawing connected corners. Single‑Level Go‑Kart Track Design must balance speed, visibility, safety, maintenance, and customer experience. Every curve affects braking, overtaking, and driver confidence. A narrow hairpin may look exciting on paper, yet create repeated congestion during busy sessions.
This guide presents ten practical tips for shaping a reliable single-level track. It considers racing lines, corner sequences, track width, runoff areas, protective barriers, pit access, drainage, and surface consistency. Small details matter. A smooth transition between asphalt sections can prevent sudden instability. Clear sightlines help drivers react before incidents develop. Proper drainage keeps rainwater away from braking zones and low points.
Watch the entry speed.
Experienced designers usually test layouts through simulations, scaled drawings, and controlled driving sessions. Professional engineers should review structural elements, emergency access, local requirements, and barrier placement before construction begins. These checks support safer decisions and stronger long-term performance.
Still, no layout is perfect. A design that works for experienced drivers may feel intimidating to beginners. A visually dramatic corner might increase maintenance without improving the lap experience. Even careful plans can miss practical issues, such as glare near the pit entrance or puddles beside a curb. Honest evaluation matters.
The following ten tips connect technical planning with real track behavior. They are intended to help owners, designers, and operators create a circuit that feels exciting, understandable, and manageable throughout the year.
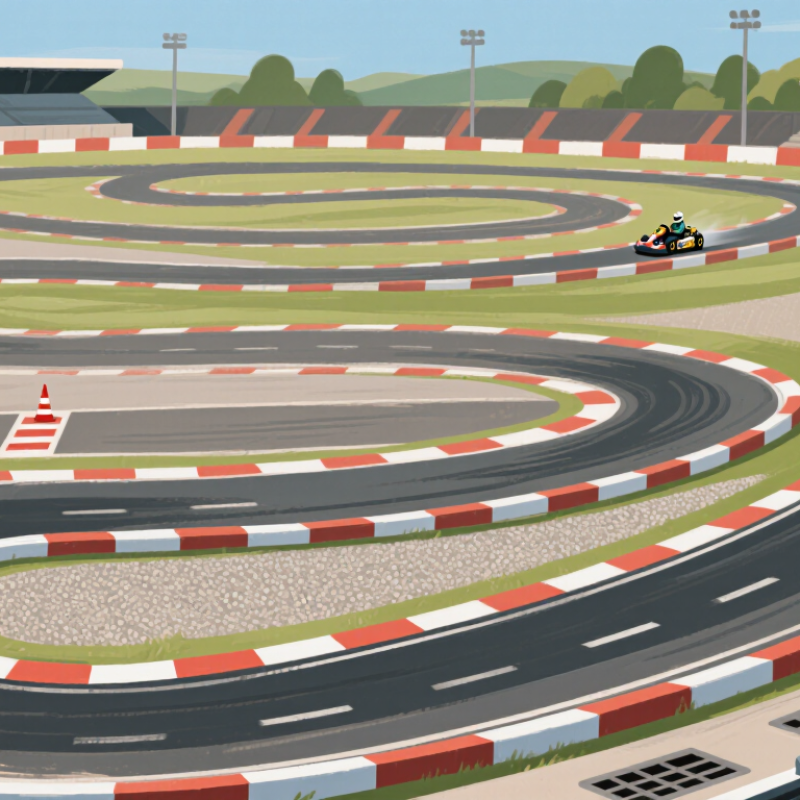
Defining the Track’s Purpose, Audience, and Operating Requirements
A single-level go-kart track should begin with a clear purpose. Decide whether it serves casual families, experienced racers, training sessions, or mixed groups. Each audience needs different speeds, corner shapes, and supervision levels. A family track benefits from wide turns and predictable sightlines. A performance-focused layout may use tighter corners and stronger braking zones. Do not design for everyone at once. That usually creates a bland and difficult experience.
Define the operating model before drawing the final line. Estimate hourly capacity, average session length, queue space, and kart recovery time. Place the pit entry where staff can see drivers slowing down. Keep marshal positions visible from key conflict points. Emergency access must remain practical, even when spectators gather beside the barriers. Consider lighting, drainage, noise, charging areas, and daily inspection routines. Small details matter. A poorly placed gate can disrupt every session.
Use the audience profile to set barrier heights, corner radii, and speed control measures. Separate beginners from faster drivers when the site allows it. Test the layout with walking measurements, cones, and timed mock sessions. Watch where people hesitate. I once underestimated queue movement, and the entrance became crowded within minutes. That mistake was useful. Track design is not only geometry; it is staff movement, customer behavior, and repeatable operation. Review the plan after real testing, because the first drawing is rarely right.
Planning the Site Layout, Dimensions, and Safety Clearances
A single-level go-kart track needs more than attractive curves. Site flow, track dimensions, sightlines, and emergency clearances must work together. The 2024 FIA Karting Circuit Regulations use 6 metres as a minimum track-width reference for many layouts, while faster sections may need additional width. This is a benchmark, not a shortcut. NFPA 610 also stresses emergency access, fire response, and clearly planned operational zones.
Tip 1: Start with a scaled site survey. Mark slopes, drainage, power lines, and spectator movement before drawing corners.
Tip 2: Keep the main racing line visible from control points. Blind bends increase operational risk.
Tip 3: Use generous entry widths for pit access and recovery vehicles.
Tip 4: Separate pedestrian paths from active track edges.
Tip 5: Leave room for barriers, fencing, marshal posts, and drainage channels. My first layouts were too optimistic. They looked efficient, but rescue access became awkward.
Tip 6: Avoid placing tight corners beside pit exits. Drivers need time to recognize merging traffic.
Tip 7: Design braking zones with extra margin for wet conditions.
Tip 8: Keep run-off areas unobstructed and inspectable. Do not treat painted lines as physical protection.
Tip 9: Place tire barriers and energy-absorbing systems according to impact risk, not appearance.
Tip 10: Check every clearance with a kart, recovery vehicle, and walking marshal. A neat drawing can still fail. Review the plan against FIA Karting regulations, NFPA 610, local fire requirements, and an independent safety inspection.
Designing Corners, Straights, Chicanes, and Overtaking Zones
Single-level go-kart tracks need rhythm, visibility, and controlled speed changes. Corners should vary in radius, but avoid sudden surprises that punish small steering errors. Begin with a clear braking zone and a wide entry. This helps drivers understand the layout during early testing. Tip: Use visible apexes and generous runoff areas. A late apex can create safer corner exits and stronger acceleration onto the next straight.
Straights should reward clean exits rather than simple maximum speed. A moderate straight after a technical corner creates useful overtaking pressure. Keep braking areas visible from the previous section. Overtaking zones need enough width for two karts, with predictable entry lines. Chicanes can separate aggressive drivers, but they should not feel like artificial obstacles. Tip: Connect the chicane to a meaningful decision. Test it slowly. Then increase speed gradually.
Track designers should inspect sightlines from driver height, not only from drawings. Watch tire marks, braking points, and repeated hesitation during trial sessions. These details reveal problems that computer models may miss. A perfect layout on paper can still feel confusing. I would revise any corner that encourages blind lunges or sudden contact. Tip: Record several sessions and compare actual lines with intended lines. Small changes to kerbs, corner width, or approach angles may improve flow, although not every change will work.
Testing the Circuit and Refining Its Safety, Flow, and Performance
10 Tips for Single Level Go Kart Track Design
Testing the circuit reveals problems that drawings often hide. Walk the full lap before driving it. Check sightlines from every marshal position, especially near blind bends and braking zones. I have found that a corner can feel exciting at low speed but become confusing under pressure. Use cones to test several racing lines, then measure braking distances with experienced drivers. Keep barriers outside likely impact paths, and provide generous runoff where space allows. Tip 1: Test in dry and damp conditions.
Flow depends on rhythm, not only lap length. A long straight needs a clear braking point, while linked corners should reward smooth steering. Avoid sudden direction changes that encourage desperate overtaking. Record lap times, but also ask drivers where they lift, hesitate, or lose confidence. These comments often expose weak transitions. My first layout had attractive corners, yet the middle section felt slow and crowded. I revised it after watching repeated hesitation there. Tip 2: Observe behavior, not just speed.
Performance testing should include different driver abilities and kart conditions. Novice drivers may need wider entries and clearer visual references. Experienced drivers can reveal inconsistent grip or unfair kerb effects. Inspect tyre marks, loose gravel, standing water, and damaged barriers after each session. Change one feature at a time, then retest the same section. That method feels slower, but it produces more reliable conclusions. Tip 3: Keep a written test log. A small flaw can become a serious pattern. Safety must remain the fastest decision.