Why Does a Valve Seal Fail and How Can You Prevent It?
A failed Valve Seal rarely announces itself with a dramatic event. More often, the warning begins as a faint oil smell, blue exhaust, or a slow loss of compression. In a workshop, these clues may appear after cold starts, long idling, or repeated high-temperature runs. The seal sits near the valve stem, where heat, friction, and oil exposure steadily test its material. When it hardens, cracks, or loses tension, oil can enter the combustion chamber. This may cause fouled spark plugs, increased emissions, and rough engine performance. Small parts can create expensive symptoms.
Understanding failure requires more than replacing the visible component. Excessive valve-guide clearance can overload a new seal, while incorrect installation may cut its sealing lip. Poor-quality elastomers can shrink under heat. Incorrect lubrication, contaminated oil, and a damaged valve stem can accelerate wear. I have seen diagnoses go wrong when smoke alone was treated as proof. Smoke is a clue, not a verdict. Compression tests, leak-down tests, service-history reviews, and removed-part inspections provide stronger evidence. Manufacturer specifications should guide every measurement.
Prevention starts with the correct seal, careful installation, and clean working conditions. Use the specified lubricant, protect the seal from sharp grooves, and avoid forcing it over retaining clips. Maintain oil quality and change intervals, especially in dusty conditions or frequent short trips. Check unusual oil consumption early. It usually costs less. Yet no seal lasts forever. Heat cycles still matter, and maintenance advice cannot replace a qualified inspection. A careful technician records symptoms, confirms the root cause, and explains uncertainty before recommending repairs. That discipline helps prevent the same Valve Seal failure from returning.
What Is a Valve Seal and What Role Does It Play?
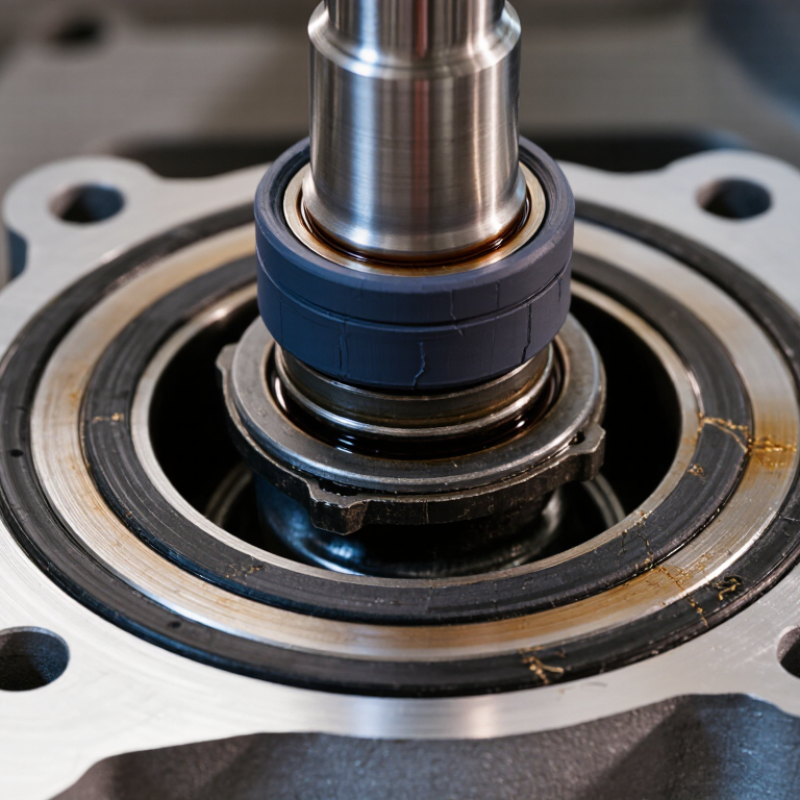
A valve seal is a small, flexible component fitted around an engine’s valve stem. It sits near the valve guide, beneath the spring and retainer. Its main job is controlled lubrication. A thin oil film must reach the stem, but excess oil must stay out of the combustion chamber. Without that balance, the valve can move smoothly while the engine avoids burning unnecessary oil. The part is small. Its effect is not.
During operation, intake and exhaust valves open thousands of times per minute. The seal meters oil as the stem slides through the guide. It also limits oil migration when the engine is parked overnight. A healthy seal supports stable oil consumption, cleaner exhaust, and consistent compression. It does not seal combustion pressure by itself. The valve face and seat perform that duty. This distinction matters during diagnosis.
Failure usually begins with heat, age, hardened rubber, or a damaged sealing lip. A puff of blue smoke after startup can indicate oil entering the chamber after the vehicle sits. Smoke during acceleration may suggest another fault, so replacing seals from one symptom alone is risky. A technician should inspect oil use, compression, crankcase ventilation, and guide wear. I have found that “just replace the seal” is sometimes too simple. Check the surrounding parts. A new seal cannot correct a worn guide or bent stem.
How Can You Identify a Failed Valve Seal?
A failed engine valve seal often reveals itself through blue-gray smoke from the exhaust. Watch the tailpipe during a cold start. A brief cloud after several minutes of parking may indicate oil leaking past the seals. Smoke during acceleration can suggest other problems, including worn piston rings or a damaged turbocharger.
Check the oil level regularly and record how quickly it drops. Unusual oil consumption is an important clue, but it does not confirm seal failure alone. Inspect the spark plugs for oily deposits, especially on cylinders with misfires. A compression test may still show normal readings because valve seals control oil, not compression. A leak-down test, vacuum-gauge reading, and borescope inspection can provide stronger evidence when used together. No single symptom proves the diagnosis.
Listen for uneven idling or difficult starting. These signs are easy to blame on ignition faults. That can waste time. A technician should compare cylinder results, inspect the valve-cover area, and check for excessive crankcase pressure. Heat, hardened rubber, incorrect installation, and poor lubrication can shorten seal life. Use the correct seal material, keep the valve stem clean, and follow the specified installation depth. Avoid forcing a seal over sharp grooves. Small damage may remain invisible at first. Rechecking smoke and oil consumption after repair is sensible, because the first diagnosis is not always right.
Why Does a Valve Seal Fail and How Can You Prevent It?
Valve stem seals can harden with age, wear from heat and friction, or become damaged during installation. A failed seal may allow engine oil into the combustion chamber, especially after the vehicle has been parked overnight or after prolonged engine braking.
The chart shows a practical diagnostic signal-strength index rather than laboratory measurements. Blue smoke after overnight parking or deceleration is more strongly associated with valve-seal leakage, while compression loss is usually a weaker indicator because valve seals mainly control oil flow rather than cylinder sealing.
How Can Valve Seal Failure Be Prevented?
Valve seal failure rarely begins with a dramatic leak. Heat, pressure, chemical exposure, poor alignment, and installation damage usually work together. A hardened seal may show tiny cracks around its lip before fluid reaches the floor. In maintenance work, I have seen clean-looking parts fail because the wrong material met the process fluid. That detail is easy to miss.
Prevention starts with correct selection. Check temperature, pressure, fluid chemistry, shaft movement, and expected service life against the seal specification. Do not rely on appearance alone. During installation, clean the groove and mating surfaces with a suitable lint-free cloth. Remove burrs carefully. Protect the sealing edge from threads, sharp corners, and dry sliding. Use the specified lubricant only when compatibility is confirmed. Uneven tightening can distort a housing and create a leak path. A calibrated torque tool is preferable to guesswork.
Still, procedures are not perfect. I would record the installer, batch, lubricant, torque, and inspection result, then review failures without blaming people. This often reveals repeated handling errors. Preventive checks should follow risk, not habit. Inspect high-temperature or high-cycle valves more frequently, especially after pressure surges. Watch for weeping, unusual movement, surface swelling, or changes in operating pressure. A simple log with dates and readings can expose gradual deterioration. If leakage returns quickly, investigate alignment, vibration, pressure spikes, and material compatibility before installing another seal.
What Are the Best Valve Seal Replacement Practices?
Valve seals commonly fail because of heat, pressure changes, chemical exposure, or poor installation. Age also hardens elastomeric materials, leaving them cracked, flattened, or brittle. During field inspections, I often find seals that look acceptable from above but leak under pressure. Look closely. A thin oil film, a damp joint, or repeated pressure loss can reveal early damage.
The best valve seal replacement practice starts with safe isolation and complete pressure release. Confirm the valve type, service conditions, seal material, and dimensions before removing anything. Keep the work area clean. Grit on a sealing surface can create a leak immediately after installation. Remove the old seal with suitable tools, not a sharp object that may scratch the metal. Inspect the stem, groove, and seating surface for corrosion or scoring. Replace damaged parts instead of forcing a new seal into a poor surface.
Apply only a compatible lubricant, and install the seal evenly without twisting it. Follow the equipment manual for tightening torque. Over-tightening can deform the seal; under-tightening can permit movement. Do not guess. After assembly, operate the valve slowly and inspect it with a calibrated gauge or approved leak-check method. A qualified technician should perform pressure testing where required. I once assumed a clean-looking groove was serviceable, but a small burr damaged the replacement seal during testing. That mistake reinforced the value of careful inspection and clear maintenance records.